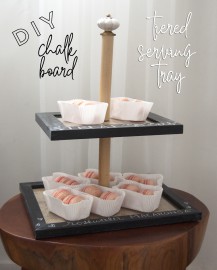
It’s February, which means that I’m gearing up for one of my favorite holidays — no, not Valentine’s Day — Galentine’s Day! If this magnificent festivity is new to you, allow me to explain: Galentine’s Day is a celebration of the amazing women in your life, whether they are your best buds, sisters, mom, work wife, etc. Traditionally (I’m using that word lightly since the holiday was invented less than a decade ago by Leslie Knope of the TV show Parks & Recreation), Galentine’s Day is celebrated over brunch, so I set to brainstorming some classy ideas for my own mid-day gathering. And, you know me, it had to include a thrifty project. Enter the Galentine’s Day tiered chalkboard dessert tray. Because what’s Galentine’s Day without some sweets?
What You Need for This DIY Project
For this project, I headed to Goodwill in search of some picture frames, fabric and a cute knob to top my center dowel. Buying supplies from Goodwill doesn’t only mean that I save money and come away with something completely unique; it also means that I’m helping create opportunities for individuals within my community who are looking to find jobs, build skills and earn credentials, including veterans, military families, single mothers and those who lack education or work experience. Here’s a full list of all of my supplies:
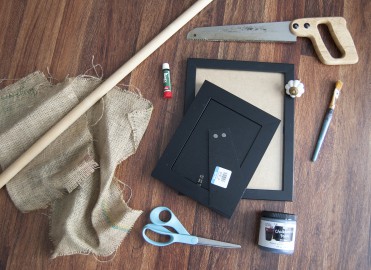
Materials:
– Two thrifted picture frames (look for frames that are flat and have enough space to write on)
– Knob or small knick-knack
– Wooden dowel (or similar)
– Thrifted fabric (I went with burlap)
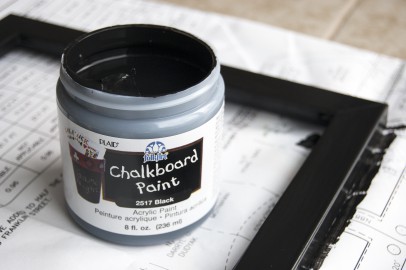
– Non-toxic chalkboard paint*
– Paintbrush
– Strong glue (make sure it will work with wood and glass. Food-safe is best.)*
– Newspaper
– Saw (chop/miter saw and jig saw are ideal)
– Sandpaper
– Level
– Scissors
– Power drill
– Wood screw
– Luan or another thin plywood
– Pencil
– Permanent marker
* Keep in mind that many paints and glues are toxic. Look for food-safe or non-toxic options if you think food may come in direct contact with the paint or glue. To be safe, you can also use paper liners or fancy napkins to protect your treats.
How to Create Your DIY Galentine’s Day Project
Step 1: Before you start, take apart the frames and clean them thoroughly. If there’s a stand or hooks on the back of the larger frame that prevents it from lying completely flat, you’ll need to remove those. Don’t worry about the smaller frame. Once everything is clean and dry, use the newspaper to protect your work surface, and then apply the non-toxic chalkboard paint to all visible sides of the wooden part of both frames. Check the instructions for the appropriate drying time. I added two coats and let it cure for more than 24 hours before using chalk on it. I also painted on the sides and front surfaces of the frames, so I have lots of options for where I can write.
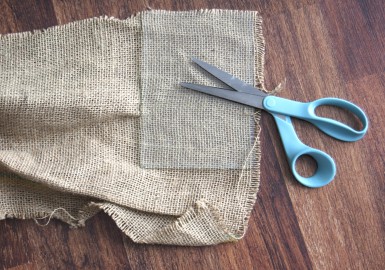
Step 2: Place the glass from both frames on the fabric you’ve chosen, trace each and cut out those two pieces of fabric.
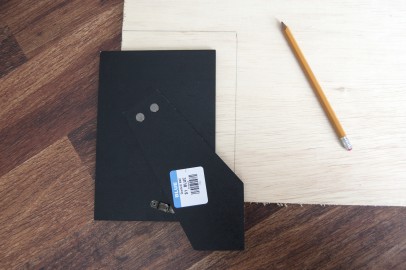
Step 3: Place the back of the smaller frame on your plywood and trace. This wood will replace the back of the top frame to reinforce it. You’ll want to make sure the wood you have is thick enough to stabilize your top tier without becoming top heavy.
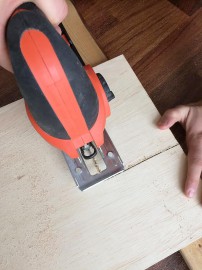
Step 4: If you have one, use a jig saw to cut out the Luan, and then sand the edges a bit. It doesn’t have to be sanded perfectly as this part will be hidden inside the top frame, but it needs to be smooth enough to fit nicely in the frame and for the glue to grab onto. After sanding, remove dust with a damp towel and allow to dry.
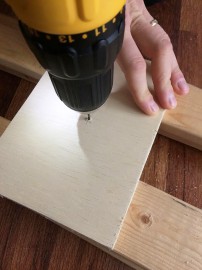
Step 5: Find the very center of the Luan, and mark this spot, then predrill a small hole. To make sure the top tier is steady, we will be screwing this directly into the bottom dowel.
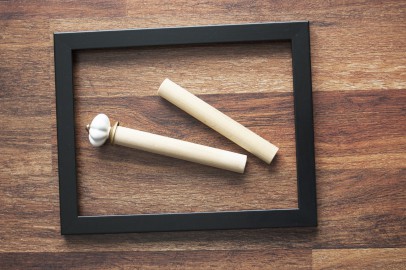
Step 6: Decide how tall you would like your dowel pieces to be and cut to size. A chop or miter saw would be ideal for this. I cut both pieces to six inches, but, in retrospect, I wish I had made the top one just slightly shorter. Sand all four ends of the dowels.
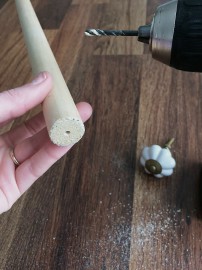
Step 7: Predrill a hole into the top of your bottom dowel. If the decoration you have to add to the top dowel needs to be screwed into place, then predrill a hole for that, too. (If it’s a knick-knack or something that can’t be screwed in, you can just glue it.) Wipe away dust with a damp towel and allow to dry.
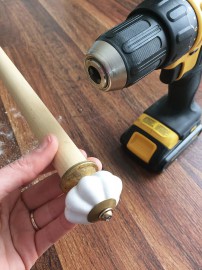
Step 8: Attach the knob or knick-knack to your top dowel either by screwing or gluing it into place. Again, if you plan to put food directly onto your trays, you’ll want to find a glue that’s safe for foods (look for glues that are intended to repair fine China). I plan to use paper baking cups and fancy napkins in conjunction with my stand so I’m okay with not using a food-safe glue.
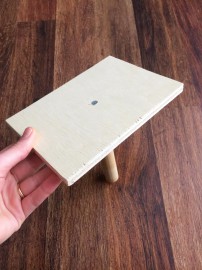
Step 9: Line up the predrilled holes in the Luan and bottom dowel, and then screw those together. If you want to, you could even add a dab of wood glue to these two before screwing.
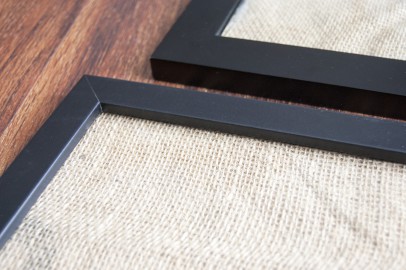
Step 10: Reassemble the frames. For the bottom frame, you can put it back together the same way you bought it except that you’ve put fabric inside instead of a photo and you may have taken some hardware off the back. But reassembling the top frame will be a little different; place the frame upside down and put in the glass then fabric. Add some glue to the outside edges of the luan then nestle that into the upside-down top frame. It should have a snug fit. Allow this to dry according to your glue’s instructions before turning it over.
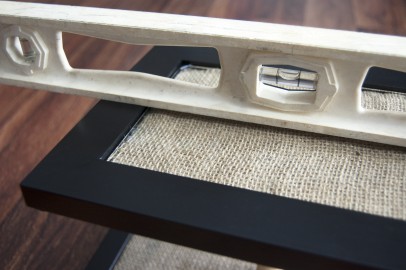
Step 11: Find the exact center of the bottom frame and mark the glass there with a small dot of permanent marker. Place the dowel attached to the top frame on the dot and make sure this top tier is level and straight above the bottom frame. When you’re sure that the placement of the top tier is correct, lift the dowel to add glue then hold firmly in place. Make sure you follow the directions on your glue for best results.
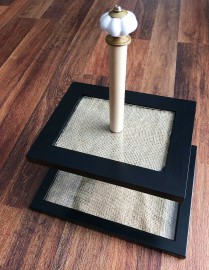
Step 12: Find the center of the top tier, mark, and glue on just as you did with the bottom. Follow the instructions for curing and conditioning your chalkboard paint. For mine, I had to wait at least 24 hours after the last coat to cure then rub a light coat of chalk all over the surface and wipe it before writing.
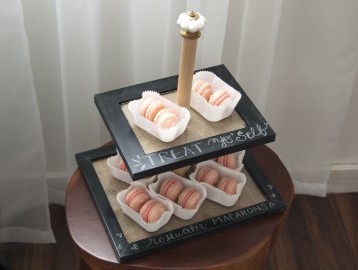
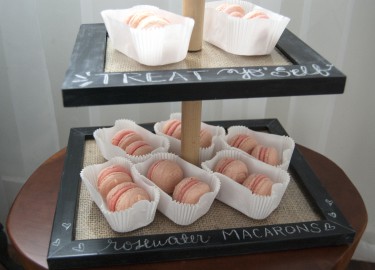
Now you’re done and ready to serve up some yummy treats to your favorite ladies! At first I was picturing an adorable display of Leslie Knope-approved heart-shaped mini waffles, but in the end I decided to try out some rosewater macarons for my Galentine’s Day dessert. Using chalkboard paint on the frame makes it easy to label food at any party without having to bother with little paper labels that get knocked over and spilled on. Plus, I love that with chalk I don’t have the pressure of getting my script perfect on the first try. Just wipe to erase and try again!
Here’s to you and your favorite gals! I hope you get a chance to just hang out, enjoy tasty treats, and get in some good belly-laughs this February 13th.


