Summer is such a fun time for fashion. You can get playful with your style by including cute patterns, textures, and colors in the clothing and accessories you wear and somehow it seems really natural. I’ve been especially loving all of the bell sleeves and fun trim ideas that I’m seeing in boutique stores these days (or, let’s be honest…in online stores), but I realized that the things I love most about these pieces are the embellishments. And, thankfully, those are super easy to add to Goodwill shirts for a fraction of the price. So why not do it myself? With summer style on my mind, I quickly went out thrifting for supplies!
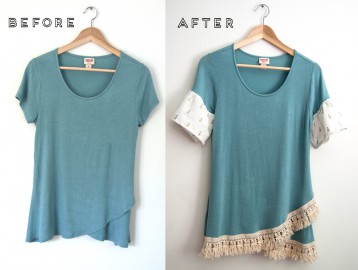
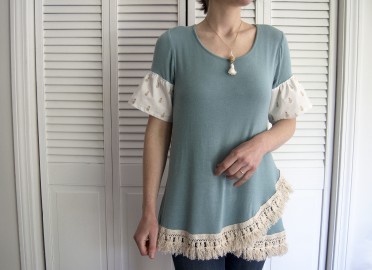
Once I got to Goodwill, I headed first to the short-sleeve shirt section and found several tops that I knew I could take up a notch. After trying them each on, I settled on this one because of its drape and the unique overlapping hem. It would be so perfect as a beach cover-up, but I knew I could make it work for my 9-5 job, too, with the right pants and accessories. Even a plain tee-shirt would look great with a fun trim or bell sleeves, though!
After I chose the right top, I went over to the fabric and miscellaneous sections to find what I needed for the sleeves and trim. Make sure you look through every bin and rack for just the right accents! They may be hiding amongst pillowcases, blankets, or yarn. After you’ve got what you need, it’s time to get crafty!

Materials:
- Thrifted top
- Coordinating fabric
- Coordinating thread
- Trim (try tassels, fringe, or pompoms)
- Straight pins
- Scissors
- Measuring tape
- Iron
- Sewing machine (or go old-school and do it by hand!)
Step 1: Wash and dry everything (if that’s safe for the fabric). My shirt is definitely secondhand so, most likely, it’s already preshrunk. But since the pineapple fabric looked brand new, I wanted to make sure I sent it through the wash and dryer before I did any cutting or sewing. I wouldn’t want to get everything cut and stitched in place then find out after my shirt’s first wash that only the sleeves have shrunk. Yikes!
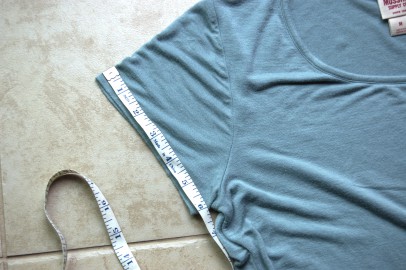
Step 2: Measure the hem of the sleeve so you know how wide it is. Then, add some additional width to your measurement to account for seam allowance and so you can have a little ruffle to it. My sleeve’s width was about 13 inches and I cut my fabric to be 17 inches wide. This made super subtle bells. The more fabric you include (for length and width), the more dramatic the bell will be.
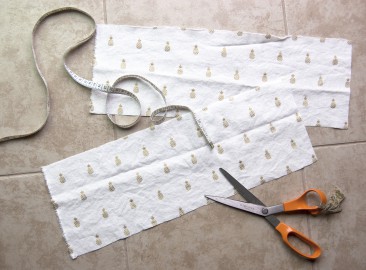
Step 3: Decide on the length of sleeve you want then cut your two bell sleeves. Mine are 6 inches tall (including seam allowance). Also keep in mind the lay of the pattern. Since my pattern does have a top and bottom I made sure it was facing the right way before I cut.

Step 4: Fold, iron, and pin your bottom edge. You’ll want to fold the bottom edge inward two times, measuring ½ an inch for each fold if you added 1 inch to your measurements for seam allowance. Iron as you go to keep the fold crisp then pin in place.

Step 5: Sew a straight stitch along the bottom edge of each sleeve removing pins as you go.
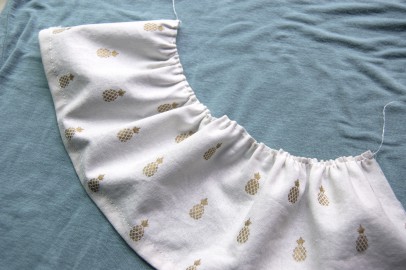
Step 6: Fold the top edge of the fabric down for your allotted seam allowance (mine is just ¼ of an inch here), iron, and pin in place if necessary. Change the length of your stitch to a basting stitch (long stitches) and sew along the top edge of the fabric. Leave long tails of thread on both ends of your sewing then pull those threads to gather the fabric into a ruffle. Keep the cinches fairly evenly distributed. Scrunch the fabric until the gathered edge is the same length as your sleeve circumference plus seam allowance.
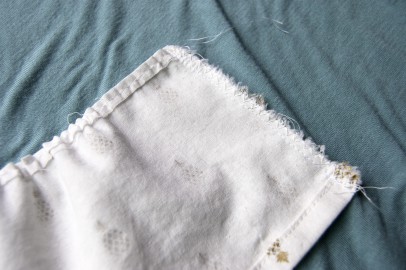
Step 7: Fold the fabric in half with the pattern on the inside (ride-side in) then pin the short edge in place. Sew it together with a straight stitch placed right where your seam allowance is (example: If you added an extra inch for seam allowance on the sides then you’d stitch ½ inch in from the edge because the two half-inches on each layer add up to one inch).
Step 8: Set your sewing machine to a zig-zag stitch (wide stitches) to do an at-home version of a serge for durability on the inside seam.
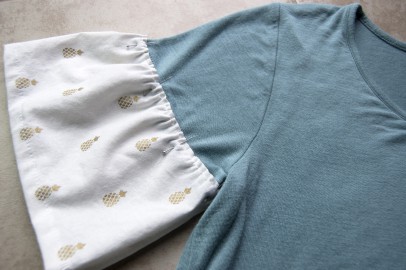
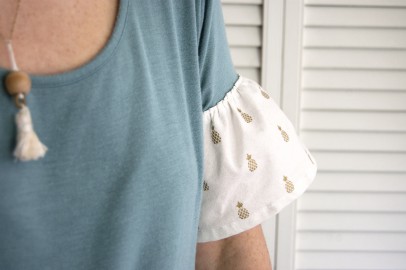
Step 9: With your shirt right-side out (the same way you would wear it), place the ruffle onto the sleeve so the inseams of the shirt sleeve and your new ruffle match up. Pin in place. Sew the ruffle onto the sleeve with a straight stitch right across the top.
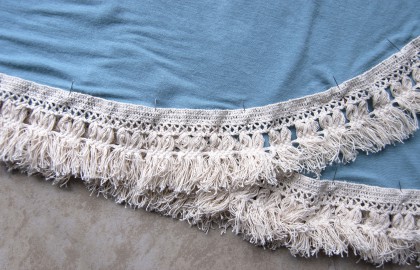
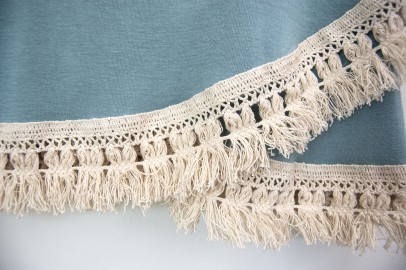
Step 10: Place your trim on the bottom edge of your shirt then pin and sew in place! Now, grab your beach supplies because YOU’RE DONE!
Where would you wear this cute little pineapple-sleeved top? To the park? To a picnic? All of the above? Maybe you’ll even wear it the next time you swing into your favorite local thrift shop. Goodwill’s 163 independent, autonomous social enterprise organizations in the United States and Canada meet the specific needs of their communities, so you’re not just shopping for project supplies when you go to yours—you’re giving back to your own community, too. I’d say, that’s the perfect way to kick off summer.