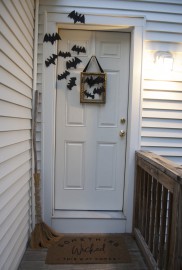
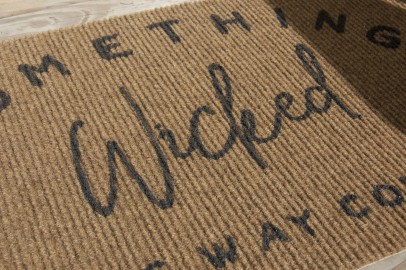
To set the mood for Halloween in your home, one of the easiest things you can do is to update your front door decor with a spooky little facelift. Since it’s the first thing you see when you arrive home, a display on your doorstep instantly creates whatever tone you want for the season. And, it’s easy to have a lot of fun with doorway decoration because, in such a small space, a little bit can go a long way. Today I want to share the spooky secrets that added spirit to my stoop with a DIY customized door mat and a bat frenzy Halloween “wreath.”
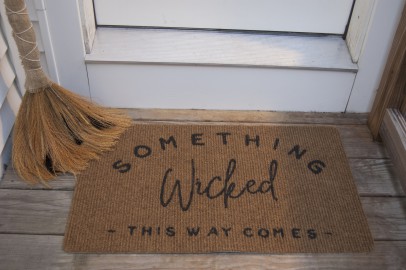
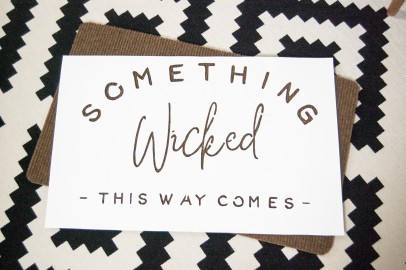
Does it seem like all of the best looking doormats are super expensive? I cringe whenever I have to spend more than $15 on something that I will literally be wiping my feet on. So, I always keep my eye out for small rugs and mats when I’m thrifting. My local Goodwill often has inexpensive, basic mats and with a little time and paint I can turn them into something that is just my taste. For this Halloween project, I channeled my old friend Billy Shakespeare with a quote from Macbeth. But I’m going to show you how to do this yourself so you can customize your mat exactly the way you want. First, let’s gather up our supplies…

Materials for the customized mat
- Welcome mat
- Poster board and painter’s tape or contact paper
- Small, coarse paintbrush
- Porch paint (or any latex paint) – You don’t need much so ask if you can have a sample!
- Exacto knife
- Scissors
- Pencil
- Paint mixing stick
- Access to a computer and printer
- Scrap cardboard
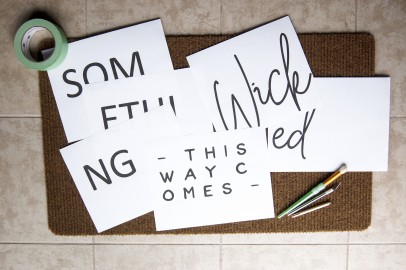
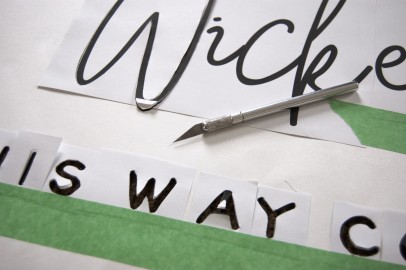
Step 1: On the computer, open up typing or image editing software. Write your chosen phrase in whatever fonts you like best. Visualize the layout of the phrase on your mat. Place plain paper out on your mat so you know how many pieces will fit (standard mats will probably fit a rectangle of four full sheets of paper, 2×2 landscape orientation, with a little extra space on every side). This will give you an idea of the size font you’ll need. For example, I knew I wanted the word “wicked” to take up about half the width of my mat (centered) so I kept increasing the size until it took up 1 ½ sheets of paper since my mat could almost fit three sheets. From there, I could estimate the other font sizes in comparison to this one. Print your text whenever it looks about right. If it looks bad when you’ve got it laid out on the mat, just adjust the size and reprint!
Note: Don’t worry if your text gets cut off slightly (like the bottom of my W in “wicked.” The printed text is just to make a template so, as long as it’s not a lot, you should be able to fix this when you’re cutting.
Step 2: Trim your poster board or contact paper as closely to the same size and shape of your mat as possible. My poster board was a couple of inches skinnier than my mat, so I just made sure the top and bottom lined up appropriately and was careful to center the design before I pulled out the paint.
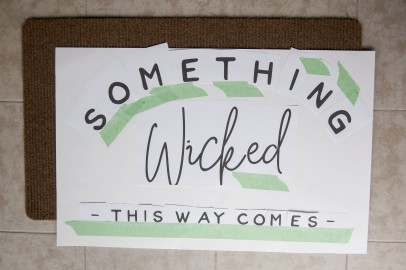
Step 3: Trim the excess paper off of your text and lay it out on your poster board or contact paper in whatever way you choose. When you find the right layout, stick it in place on the poster board.
Step 4: With cardboard under your work area, cut your letters through both layers of paper with an Exacto knife. Remember that letters with holes in them (like As, Ds, etc.) will need to keep their centers so create a little bridge that attaches these to the template. You can correct it after the stencil has been removed. At this stage, you can also fix any text edges that got cut off by the printer (see the bottom of my W).
Note: If you do forget to leave a bridge for the center of a letter, just reattach it with a thin piece of tape. No big deal!
Step 5: After you’ve cut out all of your letters (or shapes!), remove the taped papers on top to reveal your mat’s template!
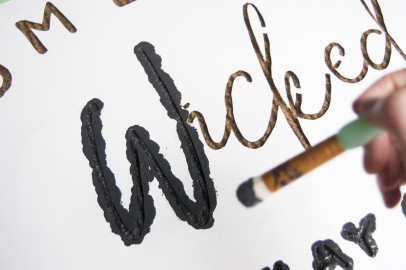
Step 6: Center the template over your mat, mix your paint, then dab generous globs of paint on the letters. Be careful to dab straight down, not to brush or allow the bristles of the paintbrush to slide under the template. This will ensure that the edges of each letter remain crisp. When you’re done painting, carefully lift off the template and allow plenty of time to dry before putting your mat to use.
Now that we’ve got the foundation of your door display all set, things are looking up… All the way up to the door itself! Here’s how to make a gothic-looking bat display:
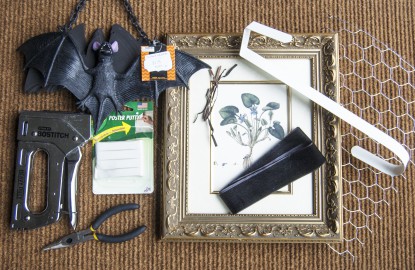
Materials for the bat “wreath”
- Ornate thrifted picture frame
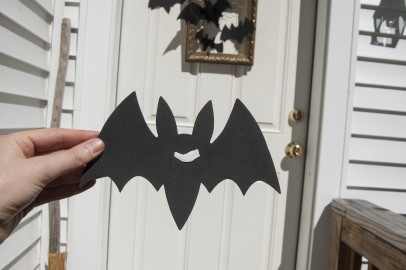
- Fake bats
- (I have one big, detailed plastic bat for the center and a bunch of smaller foam bats. My Goodwill had them front and center right when I walked in the door so I didn’t even have to hunt around! The big one is great for inside the frame while the light foam ones work perfectly outside the frame.)
- Chicken wire
- Needle nose pliers with a cutting edge
- Black twist ties
- Staple gun and staples
- Thick black velvet ribbon
- Scissors
- Wreath hanger
- Work gloves (optional)
- Poster putty
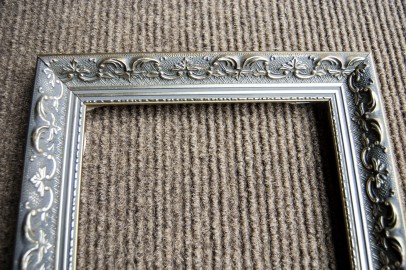
Step 1: Remove the backing and picture from the frame.
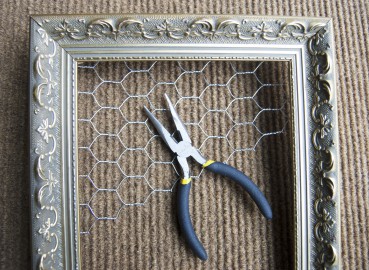
Step 2: Using the cutting edge of the pliers, carefully trim a piece of chicken wire so it will stretch from one side of the back of your frame to the other. You could place it across the entire frame, but I didn’t want to see much of it so I only added enough to hold my biggest bat on. If you needed to have enough for the whole frame, you could also spray paint the wire to blend in with the color of your door so it’s less visible. Or, you could even stretch faux cobwebs over the wire to mask it if you’d like. I do recommend that you wear thick gloves while you’re working with the chicken wire as it can be super sharp!
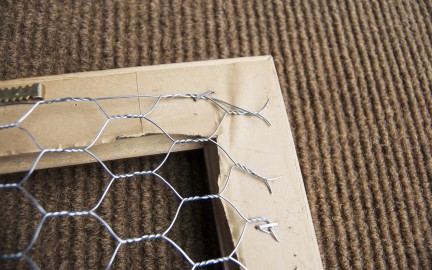
Step 3: Use the staple gun to secure the wire in the back.
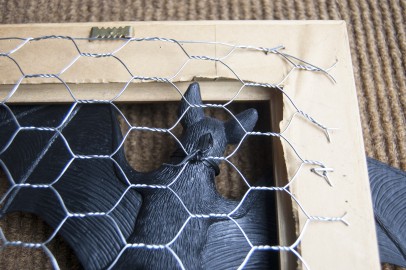
Step 4: Place your bat where you want it then use the twist ties to secure it in place. I added one around its neck and one around it’s ankle. To make them less visible from the front, twist it directly around the bat first then again around the wire itself. This way it hugs the bat tightly instead of reaching back for the wire in a conspicuous way.
Step 5: Cut your ribbon to the proper length. To determine this, I held my frame up against the door dangling (with support) from the wreath hanger and tested a few lengths to see what I liked the best.
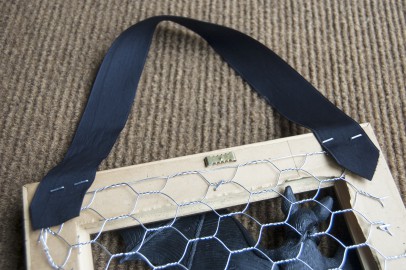
Step 6: Tie or staple the ribbon to the back of the frame.
Step 7: Use the pliers to bend in any sharp points in the wire against the frame for safety.
Step 8: Hang up your frame on the door then use poster putty to adhere the smaller bats. To make it look like the bats are flying out of the frame, let their wings stick out over the frame itself. Stick bats beside and above the door as well for that wild, out-of-control look, just make sure the door can open and close without bumping into them.
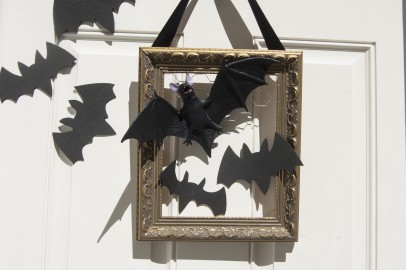
Add a witch’s broom, pumpkins, or other festive features to round out the rest of the display and you’re ready for Halloween! This will surely attract trick-or-treaters on Halloween night by quickly making your home look a little haunted. And, little did you know, as well as giving out candy this All Hallows Eve, when you shop at Goodwill for your decor and costume supplies you’ll be giving to your neighbors in yet another way. After all, only Goodwill unites caring and enterprise to empower people and build communities that work. That’s why I start every seasonal shopping trip with a visit to my closest Goodwill!