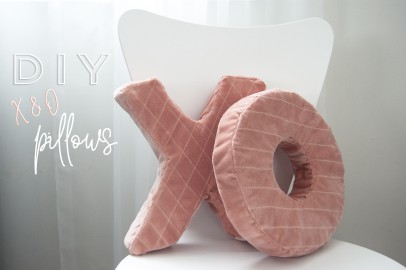
My favorite types of gifts to give on Valentine’s Day are items that will remind my sweeties year-round how much they are loved. Today’s project, X and O-shaped pillows, will do exactly that! Since I got my project supplies from my local Goodwill, I’m also spreading a little love to my neighborhood. And you can, too! By shopping at your local Goodwill, you can give someone in your community a fresh start. Here’s what you’ll need to shop for to do today’s project:
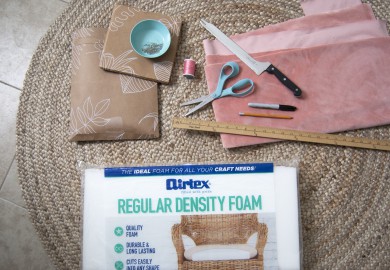
Materials
– Thrifted fabric
– Coordinating thread
– Sewing needle
– Sewing machine (Optional, but much faster and tidier)
– Cushion foam or fiber fill
– Scissors
– Bread knife or electric carving knife (only if you’re going with foam)
– Permanent marker
– Pencil, chalk, or washable fabric marker
– Straight pins
– Scrap cardboard
– Yard stick or ruler
– Sewing measuring tape
– Two circular items to trace the outside and inside of your O

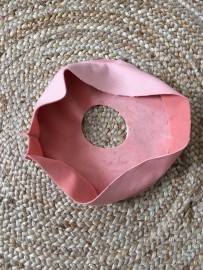
Fabric is always, always, always so much cheaper in my local Goodwill than it is to buy new from a craft store. I often find yards of like-new fabric there that are barely touched by the previous owner. So, with the fancy pink velvet I recently found, I set to work on some cute XO pillows. Here’s how:
Step 1: Decide how big you want your pillows to be and cut two pieces of cardboard to that size. I went with 11” x 11” pillows because that was half the width of my foam block and it seemed like a pretty huggable size (especially for my son).
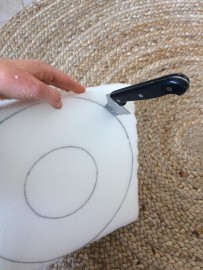
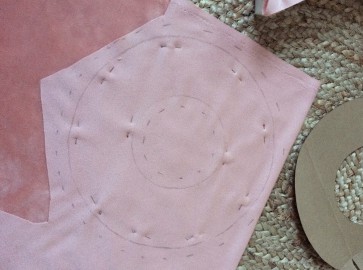
Step 2: Draw the shape of your pillows onto the cardboard. The O is easy—just walk around your house and find two circular items to trace (check the kitchen for plates, bowls, or pans first!). If you’re creating the same size pillow as me, the outer edge of your circle should be 11” in diameter and the second circle you’re tracing should fit nicely in its center. You’ll probably want the width of the letter O to match the width of the letter X so I kept that in mind while looking for something to trace. Once I had found the right item to trace (the lid of a display jar) I measured the width of my O, which ended up being 3”, and made sure the X would match. I’ll be giving directions from here on out for 3” thick letters so if yours is different just adjust.
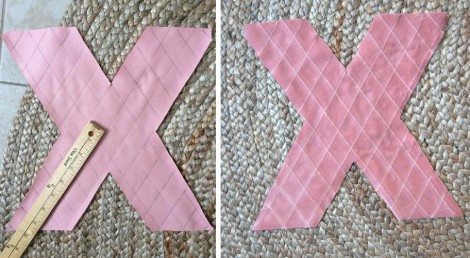
To create the X template, find and mark the exact center of your cardboard square (marked with #1 in the photo above). Measure 1 ½” above that and draw a mark (#2) then 1 ½” below it the center and draw a mark (#3). Now measure 3” in from the bottom left corner of the square and mark that (#4) do the same thing 3” in from each of the other corners on the top and bottom of the square (#s 5-7). Draw a V at the top of the X by connecting 7 to 2 then 6 to 2 using your ruler. Do the same to create the triangle at the bottom with numbers 3-5.
Now you’ll create the outer sides of the X. You can see in the photo above how I’ve made four small marks just to the right of where the pencil is. These are each 3” from the right edge of the top V. Draw a line to connect these four dots, but continue the line until it reaches halfway down the cardboard square. When you do this again coming up from the bottom right corner of the square, the two lines will meet about 2 ½” from the center mark creating the outer right side of the X. Do the same thing for the other side and you’ll have measured out your whole template. Cut out both the X and O templates.
Step 3: With the permanent marker, trace the X and O templates onto your foam. I decided to do foam rather than fiber fill so the edges of my finished pillows would be crisper and the body of the letters less lumpy.
Step 4: Carefully cut the foam. If you have an electric carving knife, I’ve heard that works wonders. But my good old-fashioned bread knife worked just fine, too. Make sure the knife stays perpendicular to the foam as you cut.
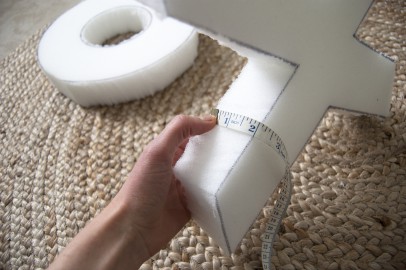
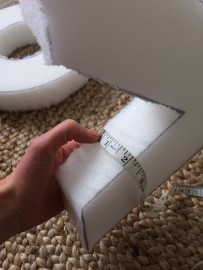
Step 5: Measure the thickness of your foam and write it down.
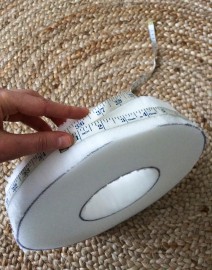
Step 6: Measure the circumference and the inside of the circle. Record both measurements. When it comes to sewing the sides of the X, you have two options: The first option is to measure all the way around the X then just cut one long piece of fabric (plus seam allowance) and wrap it around in one piece. The second option is to measure each of the twelve sides individually, add seam allowance, cut the pieces individually and then sew them together to create the sides. This takes a little longer, but I ended up going this way since the seams make the corners appear slightly sharper.
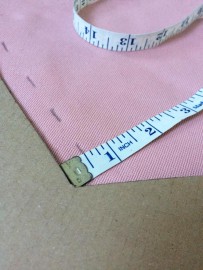
Step 7: Fold your fabric in half with the wrong side (back side) up and place the first template piece on top. Trace it so you know where you want to be sewing. Then mark your seam allowance all the way around it (I used ½” seam allowance). Do the same for the other letter.
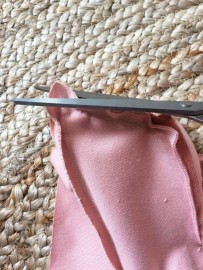
Step 8: Check to make sure that the fabric is still folded so there are two layers of fabric under your tracing. Pin the layers together. Then cut through both layers so you have the front and back of both pillows.
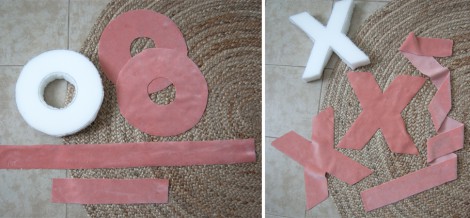
Step 9: Now cut out the pieces of fabric that will be the sides of the pillows. For the O, that will be two pieces that are both 3” thick (3” is the depth of the pillow plus ½” seam allowance for each side): the length of the first will be the circumference plus seam allowance and the second will be the distance around the inside of the O plus seam allowance. For the X, it could be one long piece that is the distance around the X plus seam allowance or smaller pieces measured to fit each of the 12 sides.
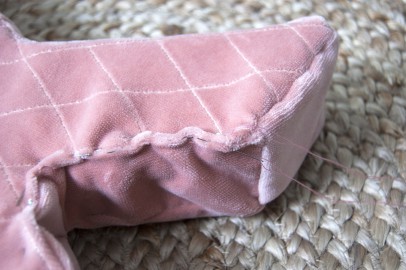
Step 10: This step is optional, but I think it adds a lot to the overall look. Plus, it’s easy! To quilt the fronts of the letters, flip them over and draw a grid on the back using your ruler. Sew directly on these lines and when you flip it back over to the right side you’ll see this pretty quilted pattern!
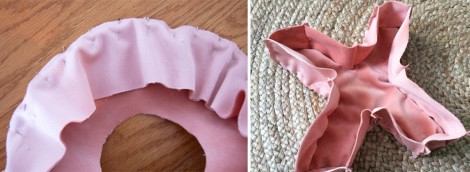
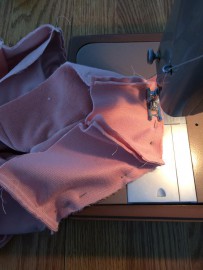
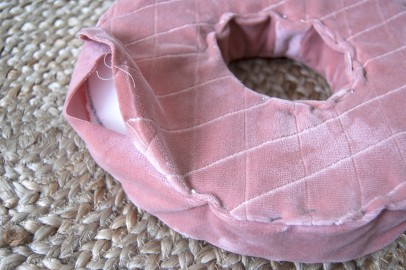
Step 11: Add the sides of the letters to the back by pinning them in place with the right sides (the velvet or patterned sides) of the fabric together. If you decided to do the X sides individually, you’ll want to stitch those together before you line it up with the back piece. Like I said, it definitely takes longer, but I like being able to see those seams.
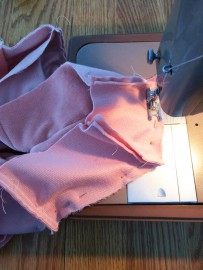
Step 12: Sew the sides of the letters onto the back. Be careful at each corner of the X. Take your time and make sure that the seams (if you went that route) are lined up with each corner.
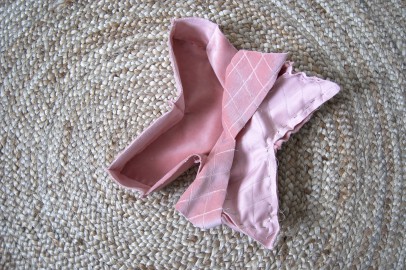
Step 13: Pin the front of each letter halfway on so the letter looks inside-out, but still has an opening big enough for the foam to slip in. Sew this half closed.
Step 14: Carefully trim the excess fabric from corners without cutting through your stitches. The more you can trim here, the more crisp the corners will look. Feel free to trim away any other excess seam allowance from the sections you’ve already sewed, too.
Step 15: Turn the letters right-side out and slide the foam inside. For the rest of the pillow that is open, fold in the seam allowance and pin the front of the pillow to the sides until the entire foam core is enclosed.
Step 16: Sew a slip stitch (check YouTube for a tutorial if you’re not sure how to do this) along the remaining seams of the pillow to close it up completely!

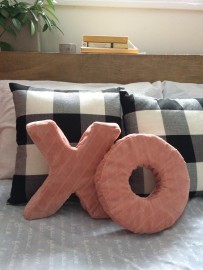
And there you have it! A cute little gift for your Valentine or just something to remind a loved one how you feel every day (not just on February 14th). I wasn’t even finished sewing these cuties up when my four-year-old asked if he could keep them in his room. He could barely wait for me to close up the seam, pull out the pins, and take my photos before they disappeared into his snuggly bed. Here’s hoping that if you decide to tackle this project, your Xs and Os are just as well-loved. Happy Valentine’s Day!